
This guide walks you through how to set up a fluid mechanics lab college procurement teams actually get past NBA and AICTE scrutiny, without overspending on kit that sits idle after year one. It is written for the lab-in-charge, the HOD who signs the indent, and the procurement officer who has to reconcile the BOQ with reality. If you are shopping the full fluid mechanics lab equipment range and want a working sequence, start here. I’ve built these labs across diploma, degree and R&D setups since the late 2000s, so the advice below is what I’d tell a colleague, not brochure copy.
Equipment mentioned in this guide
Review the product information, specifications and model before requesting a quotation.

Multi Pump Test Rig Apparatus | FluidoSurge-X 294
The FluidoSurge X-294 is a multi pump test rig (series and parallel centrifugal pump test rig) that lets students run single, series and parallel pump configurations on one apparatus and compare the resulting head–discharge–efficiency characteristics.
View product details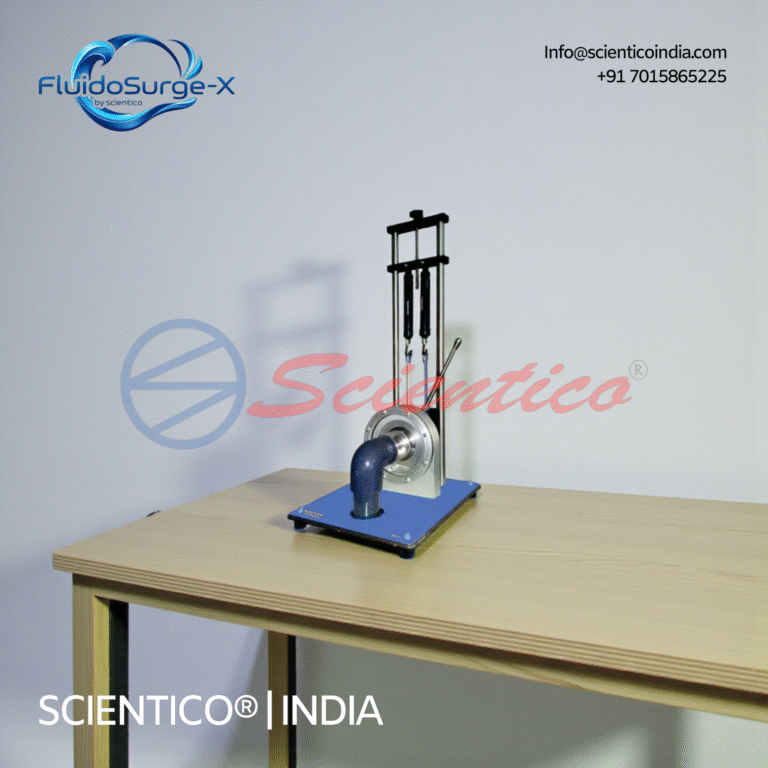
Kaplan Turbine Apparatus | FluidoSurgeX 208
The Kaplan Turbine Apparatus FluidoSurgeX 208 is a laboratory-scale training system designed to study the operating characteristics of a Kaplan reaction turbine. Manufactured by SCIENTICO, the apparatus demonstrates energy conversion from hydraulic power to mechanical power. It is suitable for instructional experiments in fluid mechanics and hydraulic machinery laboratories. The system operates using a controlled water supply from a hydraulic bench.
View product detailsWhat you need before you start
Before a single crate is opened, three things need to be settled. First, a room of roughly 90 to 140 sq m with a level RCC floor. Fluid rigs are heavy and vibration-sensitive, so a first-floor slab is fine but a mezzanine is not. Second, a wet corner: 25 mm inlet, 100 mm floor drain, and a sump if the building has erratic supply. Third, a 3-phase 415 V line with at least 15 kW headroom because pumps, compressors and the eventual turbine rig will fight for current. Get your standards reference open too, IS and ISO both, and confirm the syllabus you are mapping to before you write the BOQ. A quick read of the complete fluid mechanics lab setup buyer’s guide will save you a week of back-and-forth with vendors.
Step-by-step: fluid mechanics lab
- Fix the syllabus map first. List every experiment your affiliating university demands, tag each to an apparatus, then group by service (water, air, dead weight). This one spreadsheet is what stops a lab-in-charge from ordering two rigs that do the same experiment.
- Design the wet loop around a hydraulic bench. The bench is the spine of the lab. Everything downstream, orifice, venturi, notches, pipe friction, hooks onto it. I’d size for 60 to 80 lpm because anything less starves the multi-jet impact rig. See the hydraulic bench buyer’s guide for sizing logic.
- Add the core measurement rigs. Bernoulli’s apparatus, orifice and mouthpiece, venturi meter, notches, Reynolds’ apparatus, pipe friction with minor losses. Buy these as a set from one maker so the pipe fittings and manometer scales are interchangeable.
- Bring in the turbomachinery bay. A Pelton, a Francis, and a Kaplan rig, plus at least one centrifugal pump test rig. If budget is tight, a multi-pump test rig collapses three experiments into one footprint.
- Plan the utilities before installation day. Sump tank sized at 1000 to 1500 L, overhead tank if pressure varies, and a soft-start panel per rig above 3 kW. Fluid labs get killed by voltage sag, not by bad apparatus.
- Set the floor layout with 900 mm walkways. Rigs along the perimeter, drain channel along one long wall, demonstration table in the centre. Do not park two water rigs back-to-back, you will regret it during a lab session with 30 students.
- Commission with a calibration run. Every flow meter, pressure gauge and load cell gets a two-point check against a known reference on day one. Log the values, sign them, and keep the sheet in the lab manual. NBA reviewers ask for this.
- Write the SOP and safety card per rig. Single A4, laminated, hung on the rig itself. Start-up sequence, shutdown, and the two things a student must never do. This is the cheapest quality intervention in the lab.
- Run a pilot batch of 5 students per rig. Before the semester opens, do a dry run. You will find the leak, the tripped MCB, the missing hex key. Fix these now, not in front of a class.
- Book AMC and calibration renewals in writing. Annual calibration for load cells and flow meters, biennial for manometers. Put the dates in the departmental calendar the same week the rig lands.
Common mistakes / pitfalls
Four things I see college labs get wrong, repeatedly.
Undersized sump. A 500 L tank looks fine on paper. Run three rigs at once and the pump cavitates within ten minutes. Go 1000 L minimum, 1500 L if you can spare the floor.
Mixing manometer fluids across vendors. Mercury in one, coloured water in another, CCl4 in a third. Students get confused, readings drift, and refills become a purchase nightmare. Standardise.
Buying the “cheapest” turbine rig. A Pelton wheel with a stamped-steel runner will erode inside two semesters. Bronze or gunmetal runner, brass nozzle, or don’t bother. This is where the teaching-grade vs research-grade split really bites.
Skipping the drain slope. Flat floors pool water. The whole lab smells within a month and the concrete pits. 1:100 fall toward the trench drain, non-negotiable.
No isolation valves per rig. One leak and you shut the whole lab down. Ball valve on every take-off, labelled, and a master shut-off near the door.
Standards & compliance
For an Indian engineering college mapped to AICTE and being audited by NBA, the equipment paperwork matters as much as the equipment. Look for ISO 9001:2015 on the manufacturer, CE conformity on any imported sub-component, and ISO 17025 / NABL calibration certificates on your flow meters and pressure gauges. If the lab also serves an M.Tech research group, add traceability to national standards on the primary instruments. Vendors who cannot furnish these on request usually cannot furnish them at all.
The Scientico angle
Full disclosure, I am writing this for Scientico, but the reason I recommend the range is that it is one of the few Indian makers with ISO 9001:2015 certification, CE conformity on the exportable rigs, and a manufacturing history going back to 1993 out of Ambala. That matters because a fluid mechanics lab is a 10-year investment, and spares availability is what keeps it running past year three. For the turbomachinery bay, the Kaplan turbine apparatus from the FluidoSurgeX family handles typical diploma and degree syllabi without modification. For the pump bay, the multi-pump test rig covers series, parallel and single-pump characteristics on one skid, which is the closest thing to a floor-space cheat code I know of. Expect several weeks of production lead time on either, and add a couple of weeks for logistics if you are outside north India.
Related reading
- Complete fluid mechanics lab setup buyer’s guide (India)
- Hydraulic bench buyer’s guide
- Multi-pump test rig buyer’s guide
- Hydraulic bench price in India
- Lab equipment for engineering colleges
- Lab equipment for polytechnics and TVET
If you want the BOQ reviewed against your syllabus before you release the tender, send the syllabus copy and the floor plan through the contact page and I’ll mark up what to keep, what to drop and what to upsize. Faster than three quotation rounds, and it is free.
Frequently Asked Questions
How much floor space do I need for a college fluid mechanics lab?
Plan for 90 to 140 square metres depending on student batch size. That gives you room for a hydraulic bench, six to eight measurement rigs, a turbomachinery bay with three turbines and a pump rig, plus 900 mm walkways and a demonstration table. Anything under 80 sq m starts forcing compromises on the turbine bay.
What is the minimum equipment list for AICTE and NBA compliance?
At minimum: hydraulic bench, Bernoulli’s apparatus, orifice and mouthpiece, venturi meter, notches, Reynolds’ apparatus, pipe friction rig, Pelton turbine, Francis turbine, Kaplan turbine, centrifugal pump test rig, and impact of jet. Universities differ slightly, so map your syllabus first and add reciprocating pump or gear pump if your affiliating university lists them.
How long does a full fluid mechanics lab setup typically take?
From purchase order to first student experiment, expect several weeks of production at the manufacturer end, one to two weeks of logistics inside India, and about a week for installation, commissioning and calibration. Total roughly two to three months if the room and utilities are ready. If civil work is still pending, that becomes the critical path, not the equipment.
Should I buy a multi-pump test rig or separate single pump rigs?
For a teaching lab with 30 to 60 students per batch, a multi-pump test rig wins on floor space and lets you demonstrate series and parallel on the same skid. For an M.Tech research group that needs to swap impellers or run long characteristic tests, separate single pump rigs give you more flexibility. Most colleges I set up go with the multi-pump rig plus one dedicated centrifugal pump rig.
What ongoing costs should I budget for after setup?
Annual calibration on flow meters and pressure gauges, biennial calibration on manometers, consumables like manometer fluid and gland packing, and a small spares kit for seals, bearings and nozzles. Budget roughly 3 to 5 percent of capital cost per year for a well-run lab. AMC with the manufacturer is worth taking for the first two years, after which your lab technician can usually handle routine work.
One honest ask
We don't gate anything on this site. You just read the whole thing free. If it was useful, leave your email and two things happen: we send you this page as a plain-text block you can paste into a tender file or an internal email, and we notify you the next time we publish a buyer tool like this one. Nothing else. No drip sequence, no sales calls booked without asking.